- User Management
- Setting up a profile
- Connecting with a mentor or protégé
- Track mentorship activities
- Meeting management
- Messaging
- Review mentorship program
- Certificate of achievement
- Event management
- Contact us
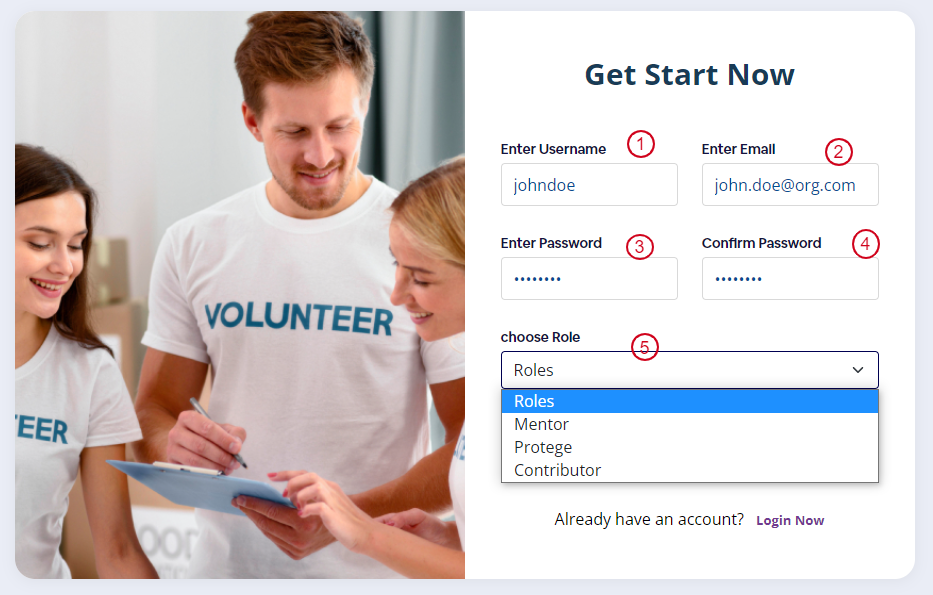
Create Account
- Enter Username.
- Enter Email Address.
- Enter Password.
- Enter Password to Confirm Password.
- Select role from dropdown.
- Click checkbox to accept and agree to the terms and conditions.
- Click on Signup button to create account.
- An activation account link will be sent to your email. Proceed with that link to activate your account.
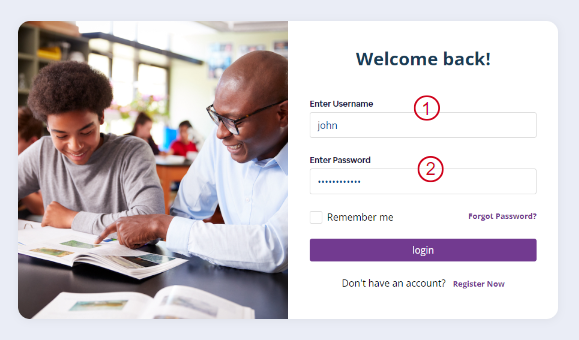
Sign in Your Account
- Enter Username.
- Enter Password.
- Click on login.
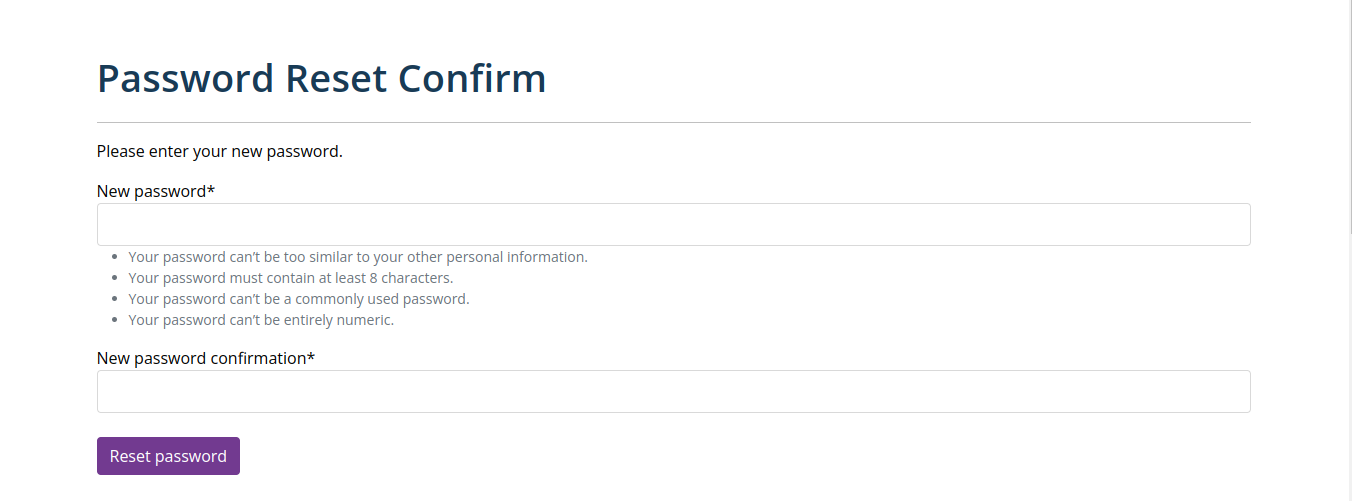
Reset Password
- Enter your registered email address.
- Click on Send email to recieve instructions to reset password.
- Upon clicking on the link, you will be redirected to set your new password.


Personal Information
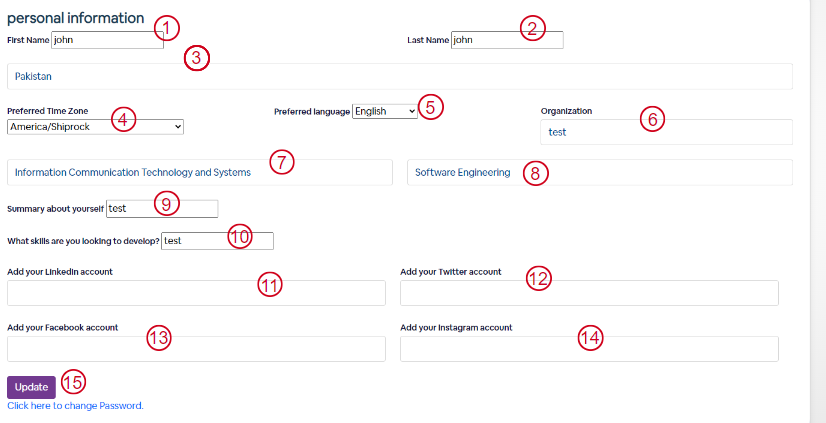
After creating an account successfully, you can now setup you profile.
- Enter First Name.
- Enter Last Name.
- Select your country from country dropdown.
- Select your time zone from time zone dropdown.
- Select your preferred language from language dropdown.
- Enter your organization. (optional)
- Select your industry from the dropdown.
- Select your specialization.
- Enter your summary about yourself.
- Enter your skills
- Enter your linkedin account. (optional)
- Enter your twitter account. (optional)
- Enter your facebook account. (optional)
- Enter your Instagram account. (optional)
- Click on update button.
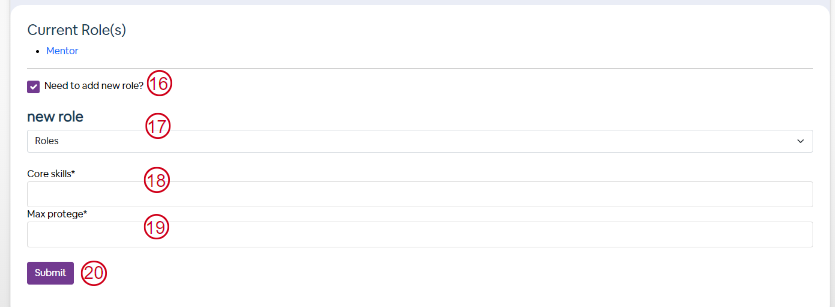
Add User Role
- Click checkbox if you need to add new role.
- Select your role from the dropdown.
- Enter your skills
- Enter Max protege
- Press Submit to add role
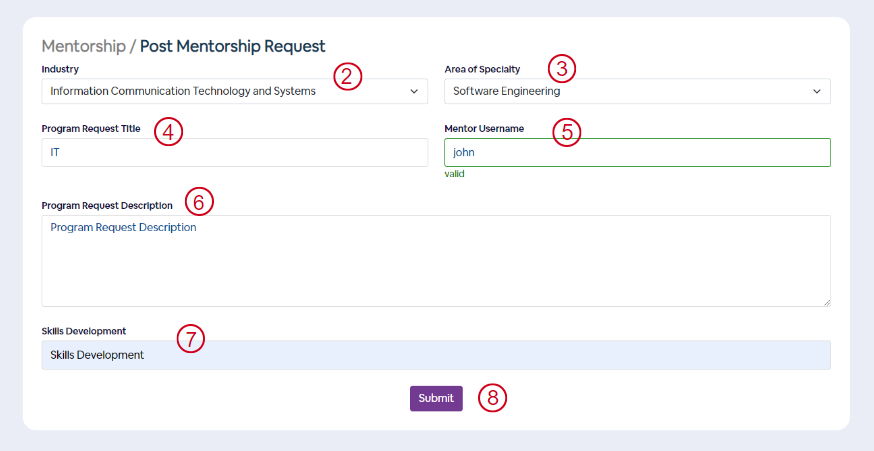
Mentor Request
- Click on send request.
- Select industry
- Select area of speciality
- Enter Program title
- Enter a valid username for mentor/protege
- Enter program description
- Set your skill development you want to add
- Press submit to send request
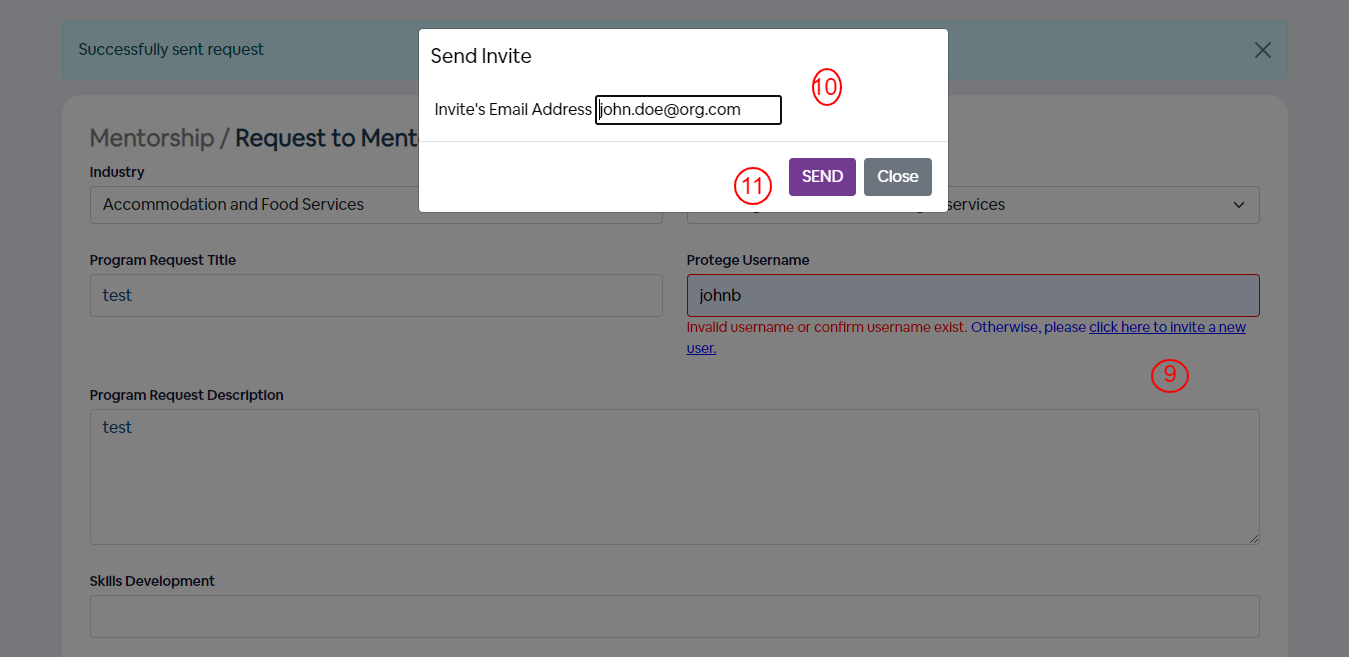
- Click on Invite user to create an account.
- Enter email for sending invite
- Send invite. User will get email with invitation link
Navigate to Mentorship Tab.

Incase if the user name is not valid.
Accept/Reject Requests
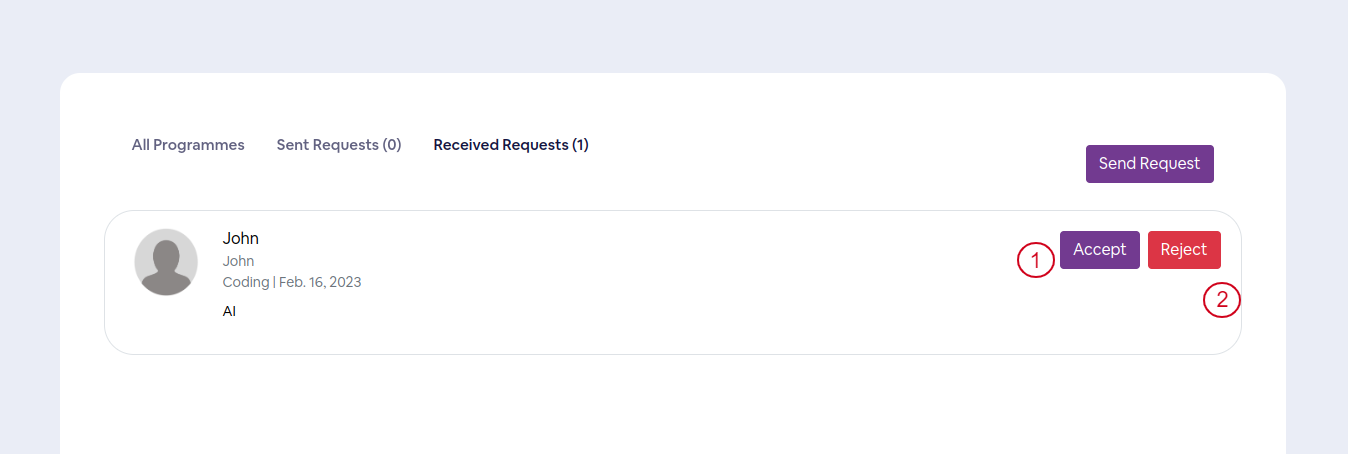
Navigate to Mentorship Tab > Recieved requests.
- Click Accept to accept request.
- Click Reject to reject request.
Mentorship Board
After accepting the request, you can view the programes on mentorship board.

Set Objectives
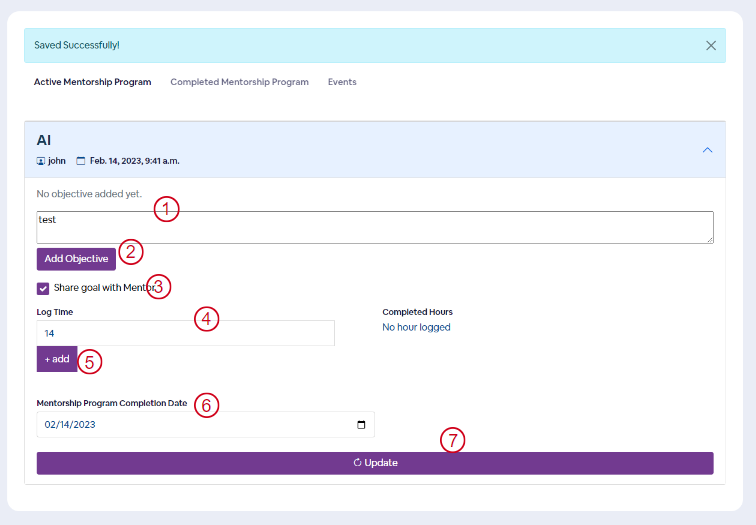
Navigate to Programs Tab > Active Mentorship Program.
- Enter objective to your program.
- Press Add objective to set objective.
- Check "Share goal with mentor" to make the goal visible to the mentor.
- Enter Log Time.
- Click +add to log hours to your program.
- Set the expected program completion date.
- Click Update.
Mentor can mark Mentorship Program Complete if the program is completed.
Log Hours
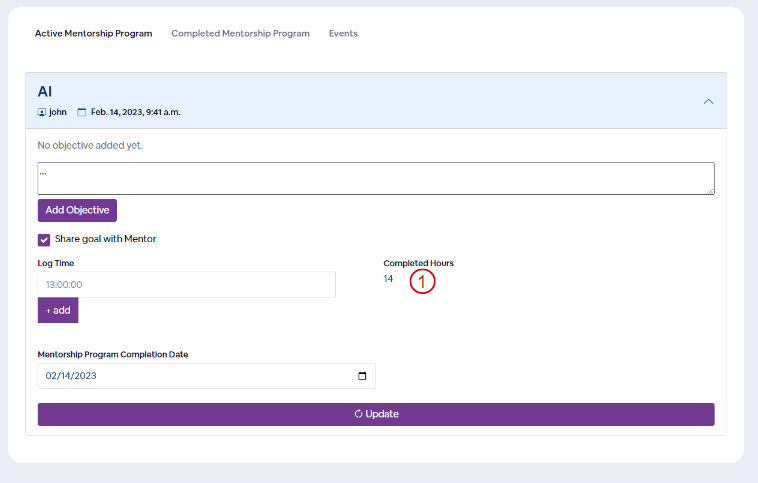
- Log hours can be updated by adding them.
Set Availability
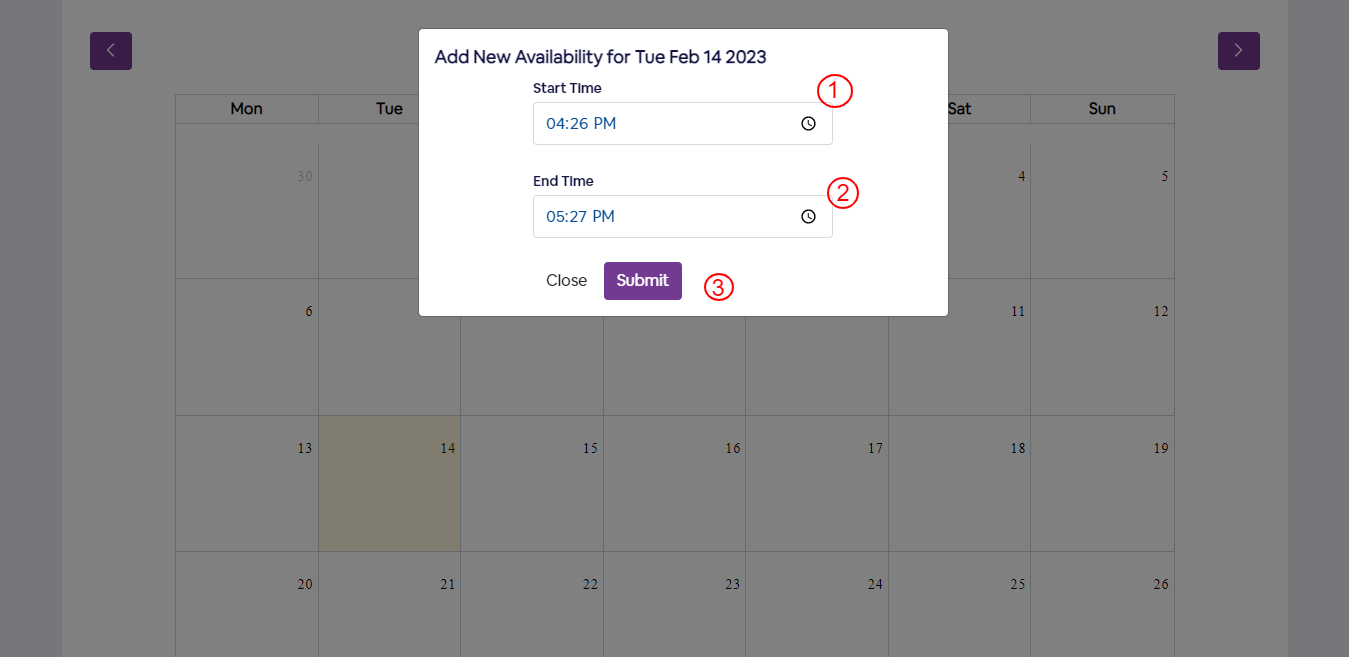
Navigate to Meetings Tab > Set Availability.
- Enter available start time.
- Enter available end time.
- Press Submit to set availability time.
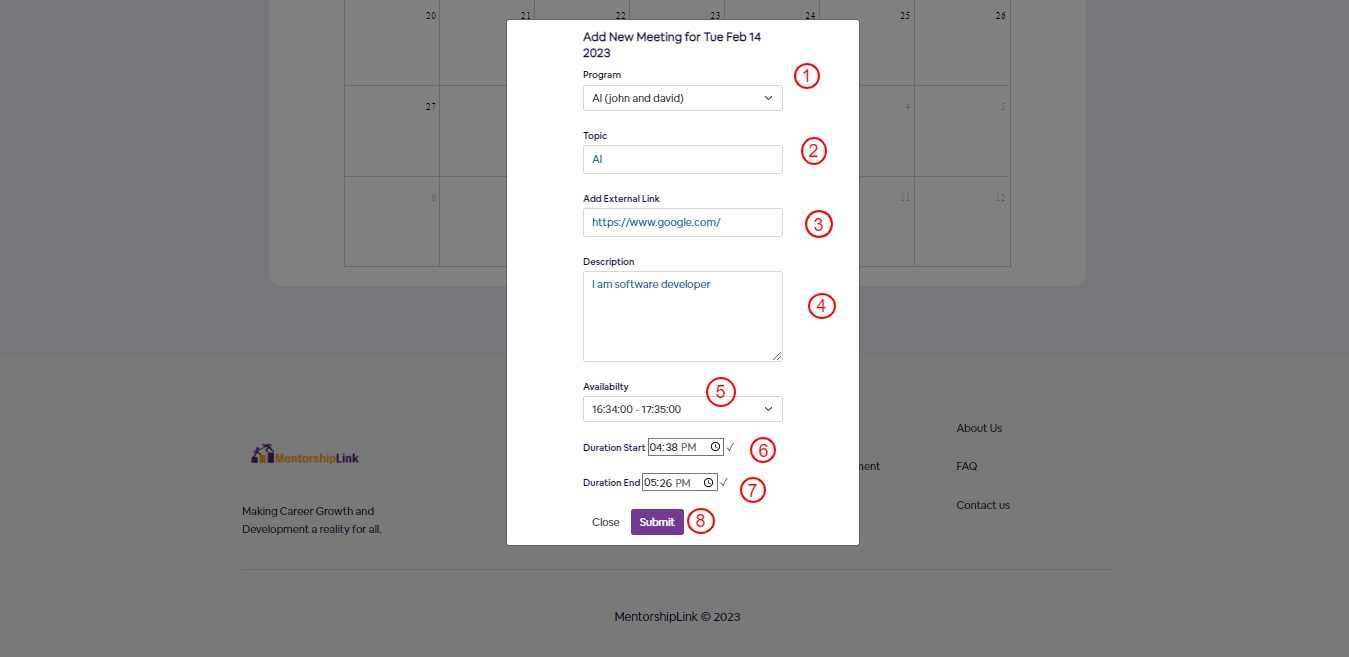
Setup Meeting
Navigate to Meetings Tab > Upcoming Meetings. Click on any present or future date
- Select Program dropdown
- Enter the topic.
- Enter External link.
- Enter description.
- Choose availability.
- Select Duration start time.
- Select duration end time.
Start and End time must be in between availability time.
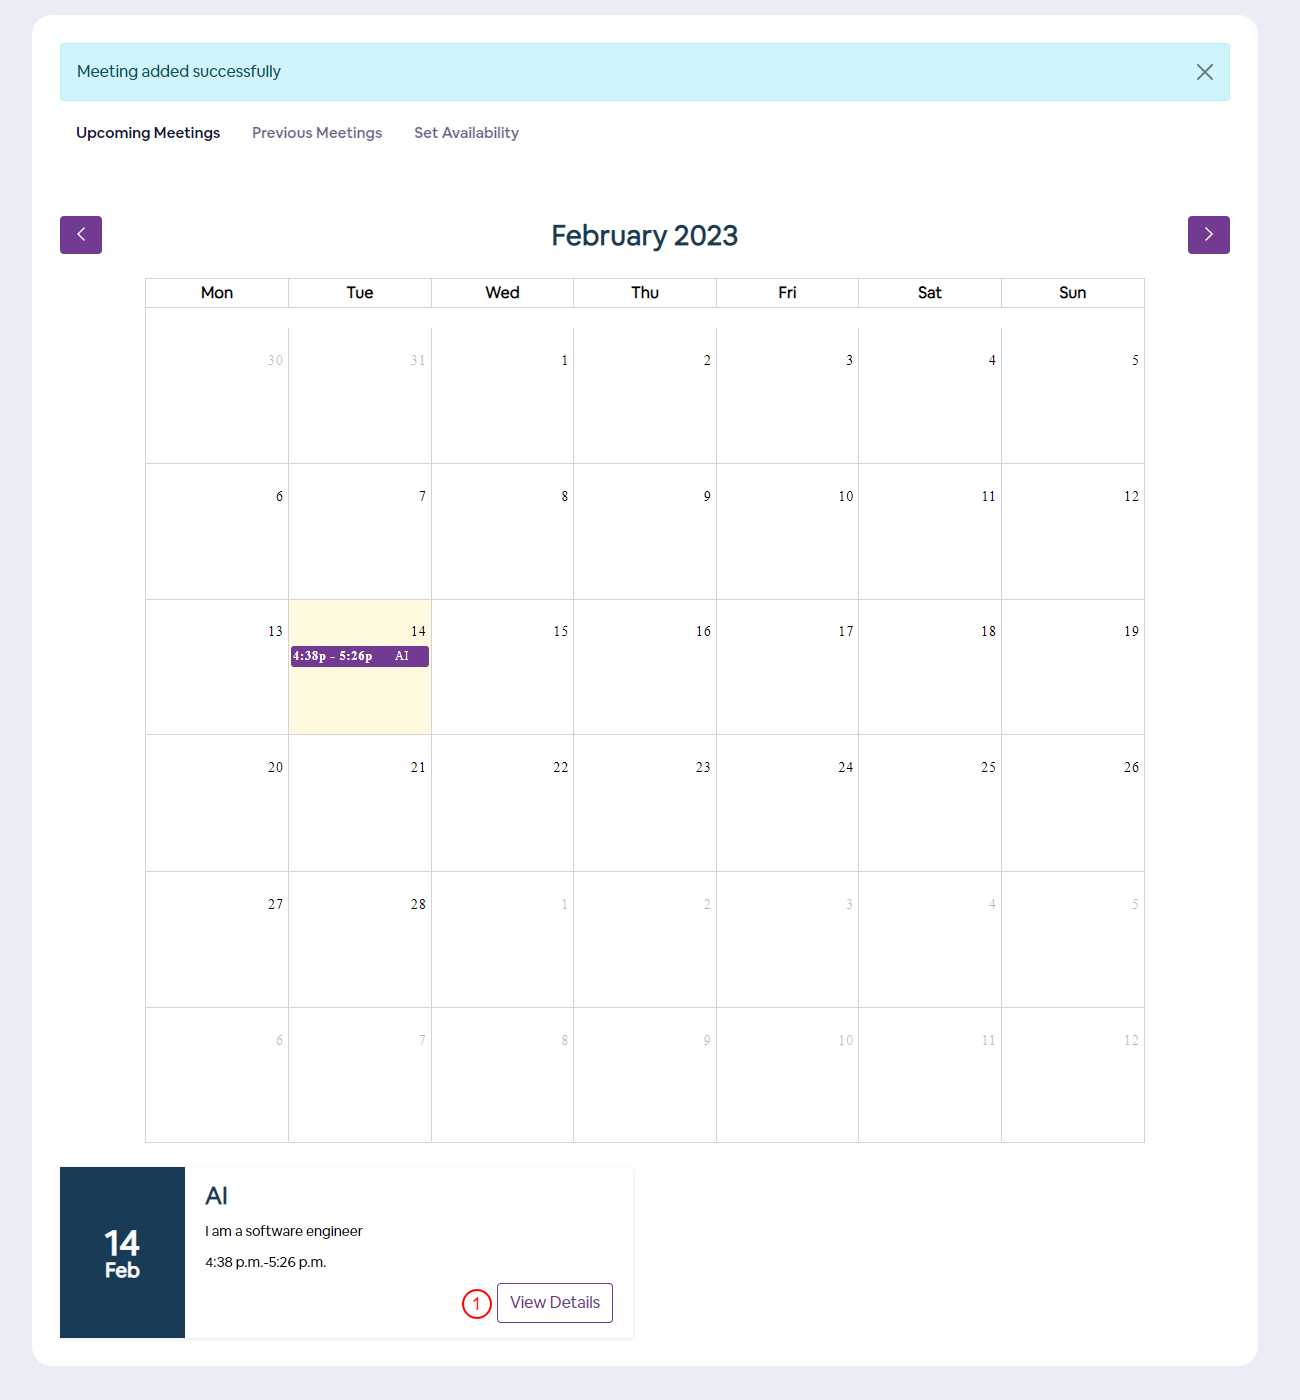
View Upcoming Meeting
After Setting up the meeting, the date will be marked on calender and its short description will appear at the bottom of the calender.
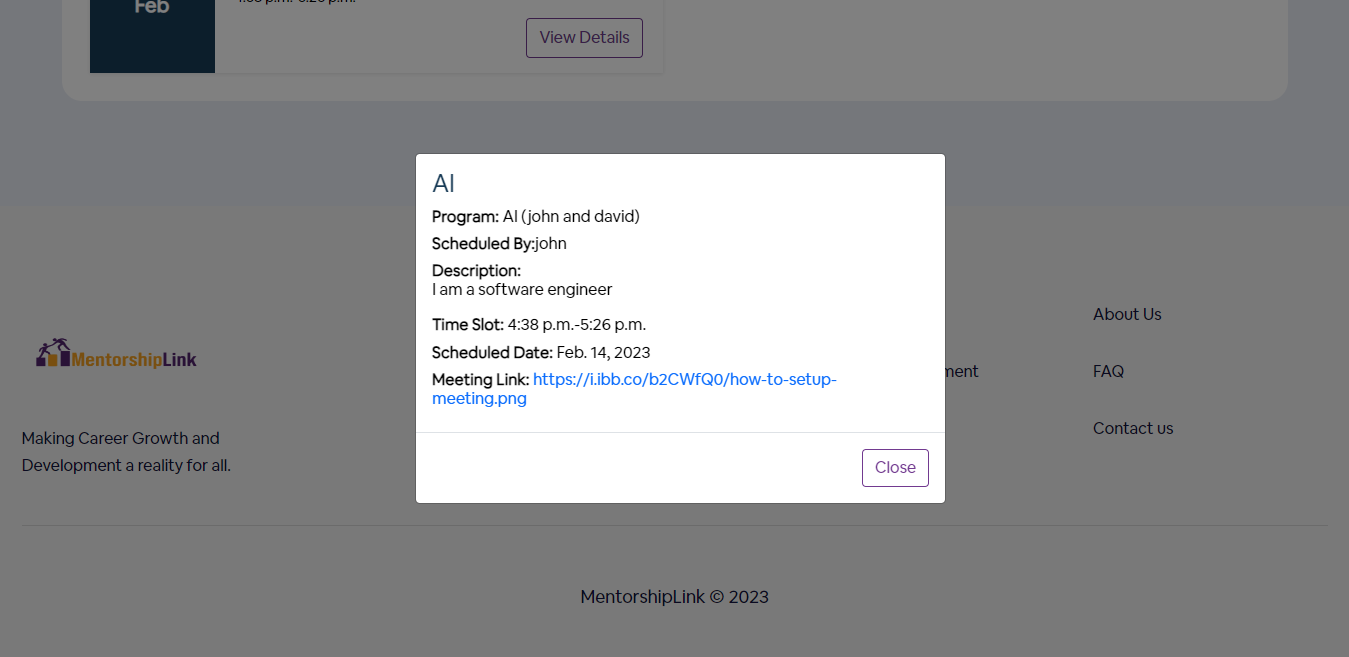
- Click view details. Meeting description will appear as a modal
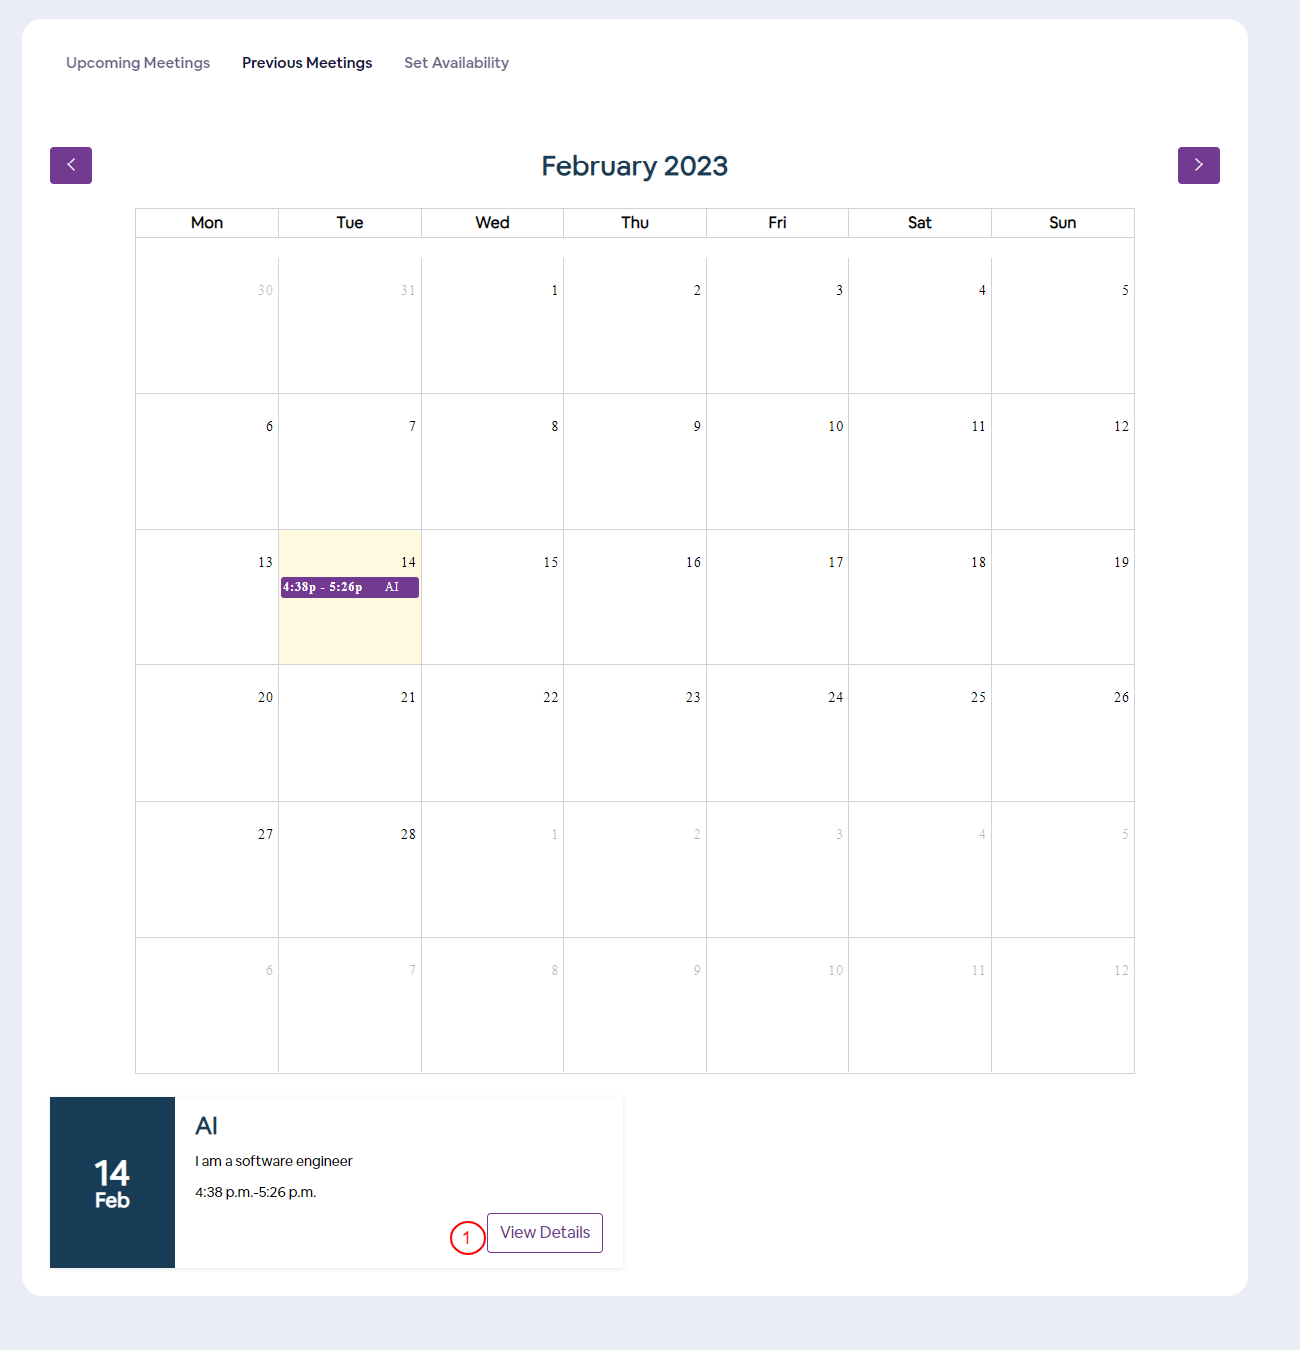
View Previous Meeting
Navigate to Meetings Tab > Previous Meetings.
Previous meetings will be marked on calender and its short description will appear at the bottom of the calender.
- Click view details. Meeting description will appear as a modal

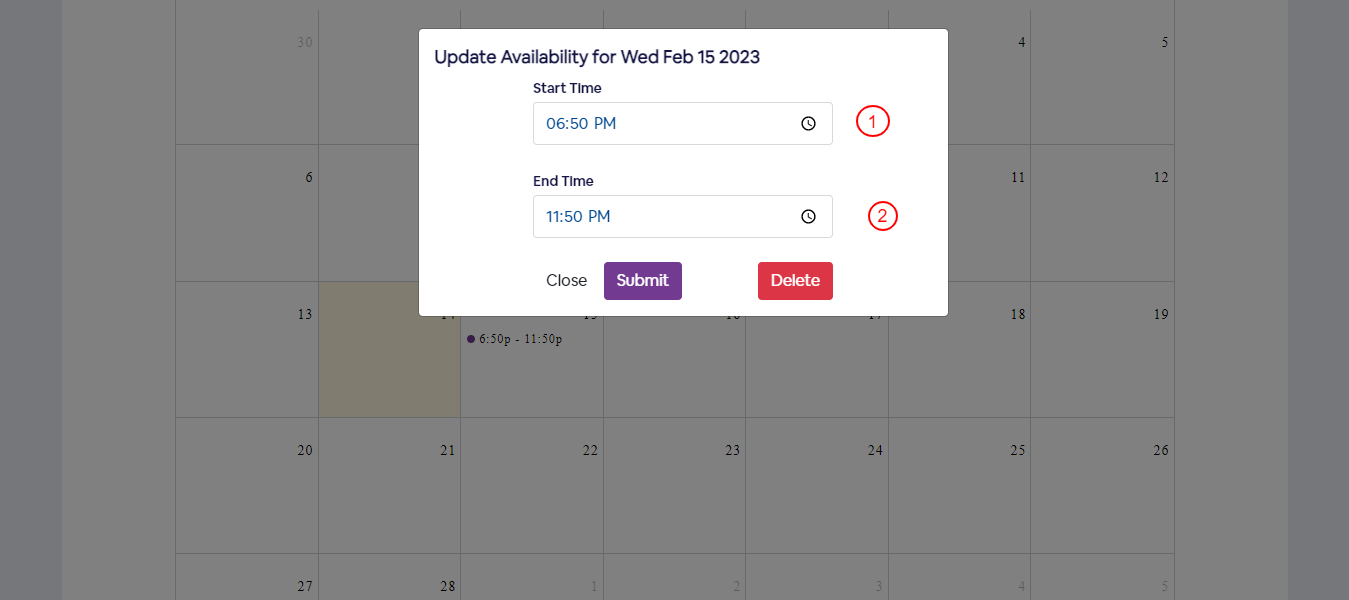
How to Edit Availability
Click on the calender's date to edit where the availability needs to be changed.
- Update start time.
- Update End time and press submit
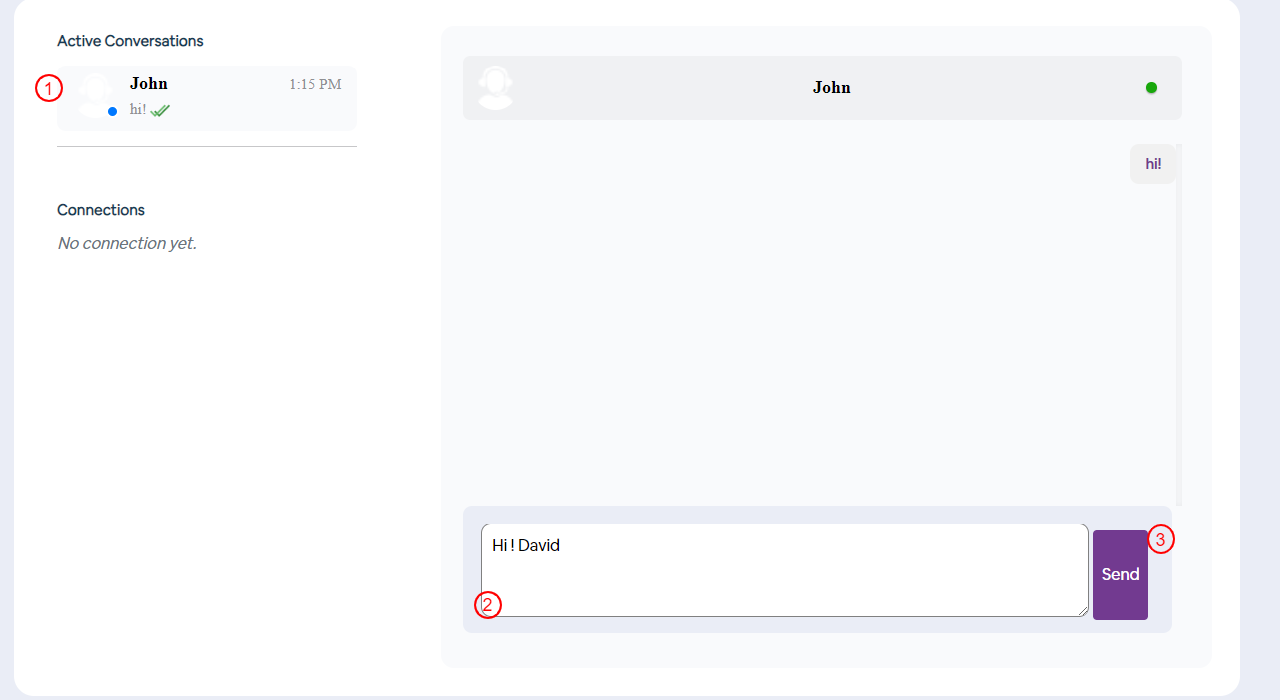
Chat Connection
Navigate to messages by clicking on message icon.
- Select the recipient you want to send message.
- Type a message in the textarea.
- Click Send button to send messages.
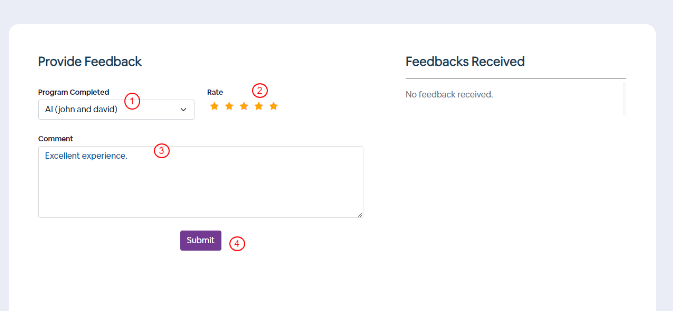
Review Mentor or Protege
After the completion of program, user can leave feedback for mentor/protege.
Navigate to Feedback.
- Select program completed.
- Fill the star rating
- Enter your Feedback.
- Enter submit button.
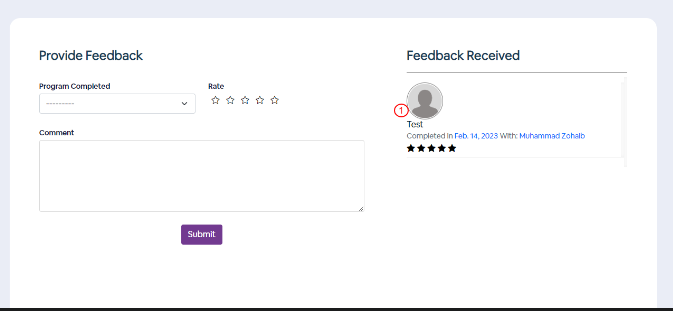
View Your Feedback and Review
- Previous feedbacks will be displayed on the right sidebar.
Generate Certificate
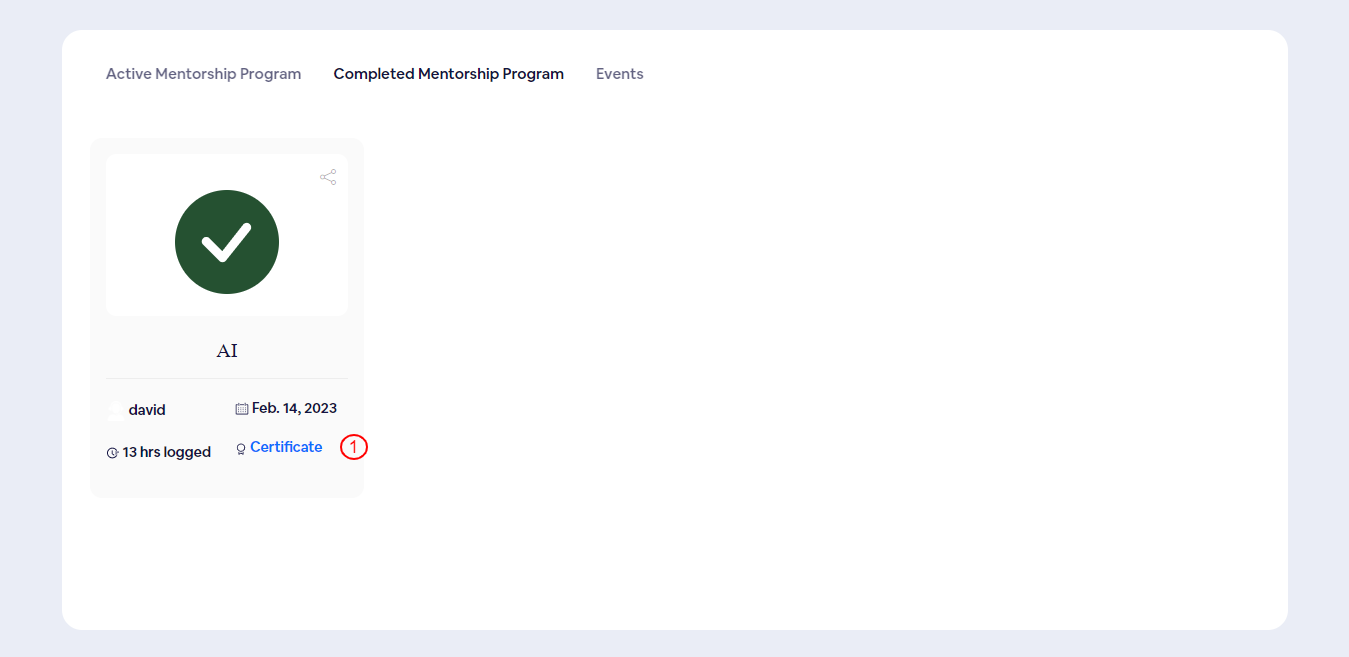
After the completion of program, you will get the certificate.
Navigate to Programs > Completed Mentorship Program.
- Click on certificate.
Verify Certificate
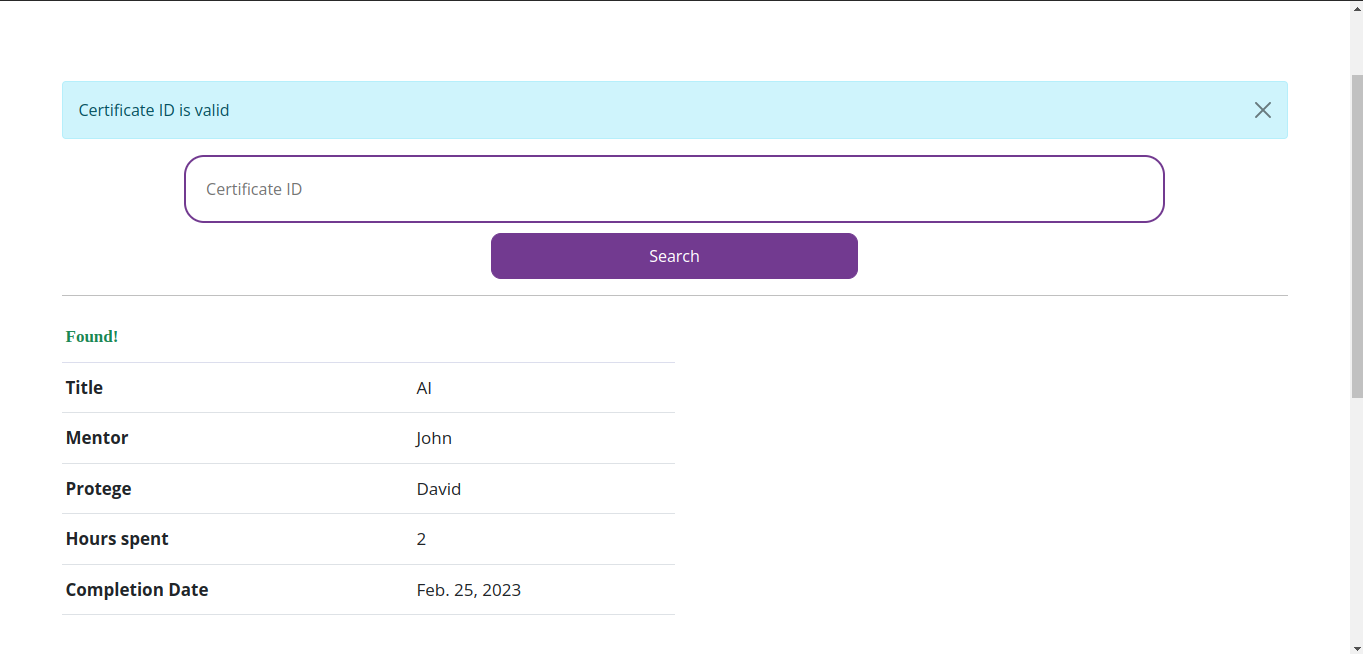
You can verify any certificate if it is valid. Navigate to Verify Achievement at the footer.
- Enter the certificate ID (Available at the top left on the certificate).
- Click on search.
Certificate details will be shown if it is valid.

Event Management
Submit Ticket
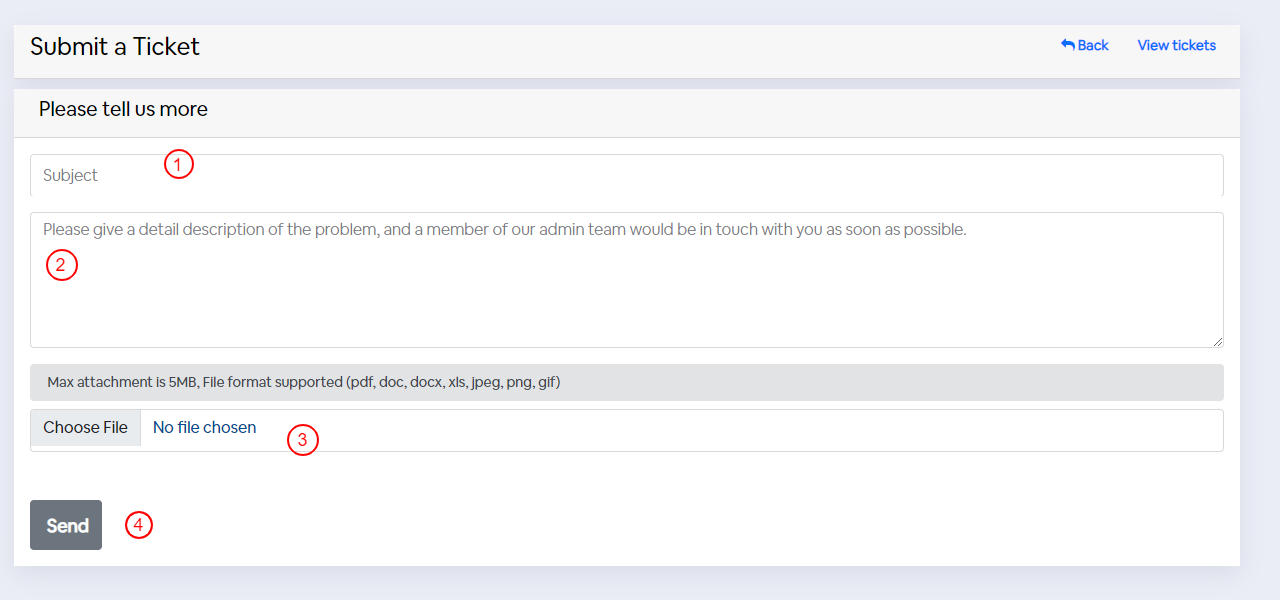
For details and inquiries you can create a ticket. Our team will immediately respond to it.
- Enter your subject.
- Enter your detail description.
- Choose your attachment.
- Click the send button.
Let's Start a Conversation
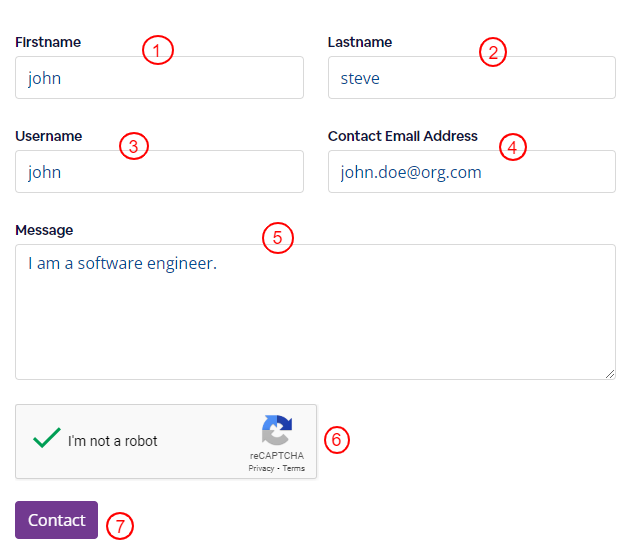
You can also directly contact us. Navigate to Contact us page.
- Enter first name.
- Enter last name.
- Enter username.
- Enter contact email address.
- Enter your message.
- Click recaptcha checkbox.
- Click on Contact button to submit the form.
